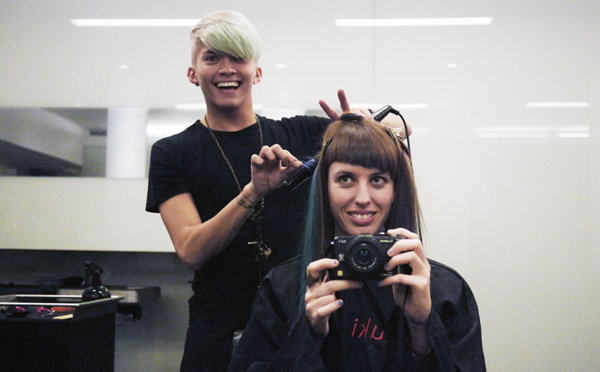
People are always interested in how I dye my hair, and I've had a few requests to create a DIY on Kitty & Buck. I'm not a hairdresser (by any means) so I can only share my experience, perhaps it can help you out! If you have any specific questions about your hair, I definitely recommend visiting a professional, I make sure I see my hairdresser at least once every 3 months to keep on top of my hair health with a trim and touch-up on my roots. In the past year, I've only had my bleaching done once. My hairdresser prefers to keep my highlights underneath my 'natural' colour so that they can grow out and not need retouching every time. This helps to keep bleaching to a minimum. The same goes for my fringe, it basically grows all the way out before we retouch it with the bleach.
I purchased my hair colours from
Hair Crazy. I don't know if this is the best place or not, I just stumbled across it, and because I bought so many colours, I haven't needed to replenish them yet. I also grab the odd colour from a pharmacy, which is the "Fudge" brand that we have in Australia.
What you need:
Hair Dye
Conditioner
Latex Gloves
Tinfoil (pre-torn into pieces, big enough to wrap your hair - it will depend how long your hair is)
Plastic Wrap
Plate or palette
Tint Brush
Preparation:
I always cover my plate in plastic wrap so I can just wrap it all up and throw away the excess dye at the end. The plate is clean too! So I don't need to worry about cleaning the dye off it. When I dye my hair, I try to wear an old top in case I spill dye on it. One that you can take off without going over your head is best - a zip or button up top. Finally, I place some plastic wrap on the bathroom countertop, so if I do spill dye, it is protected. The only issue is, I always spill dye everywhere where there
isn't plastic wrap. It's called Murphy's Law.
This is how I do it:
I mix my colours on the plate, I never really use a colour 'out of the bottle', I love making my own. So get creative and mix your colours! Some knowledge of what might happen to the colour when you mix is useful... I wouldn't mix green and red, for example ;) You can see a post about what colours I mixed together
here. If I want the colour to be more pastel, I mix in some conditioner with it. I actually mix a little conditioner into all of my colours, so my hair gets some extra conditioning love. Keep in mind, the more conditioner you add, the lighter the colour and the less time it will last. This time, I am going more vibrant and I know these colours wash out to a nice pastel over time.
I pin all of my non-bleached hair into a pile on top of my head, with a conditioning treatment applied. It's good for my hair and helps 'glue' it up there while the colour is being applied.
Colour-time! I work with one colour at a time, to avoid cross-pollinating the brush. First up, pink and blue! I find the pink and blue washes out first, so I apply them first so they have the longest time on my hair, and hopefully 'takes' more.
I select a section of hair where I want the colour and 'paint' it on using the brush. You have to work in fairly small sections to ensure that each strand of hair gets coated. As each section is painted, I wrap it in foil. This protects it from bumping on my clothes, other pieces of hair, and keeps it from drying out while I let the dye soak in.
I work my way through each colour, trying to make a nice rainbow dispersion over my head. (It's pretty random!) Make sure you wash the brush in between each colour, and dry it on an old towel so it doesn't water down your dye. Continue painting and wrapping until you look like a crazy lady.
Most packets say to leave the dye in for 15 minutes or so. I usually leave mine for 1-2 hours. It gets very vibrant, but I find it lasts longer too. For more pastel colours, aside from adding conditioner, you can leave the colour in for less time too. When I had baby pink in my fringe, I put in a strong red dye for about 1-2 minutes. So there are a few ways you can work.
I wash it out in the shower, gently pulling the foil out under running water. Then I wash it a couple of times with shampoo to get rid of all the excess dye. Finish with a good conditioner, and then... Admire your handiwork.
Easy? I have a few extra points.
1. ALWAYS test for allergies to a dye before you use it. There is generally a warning on the packet and instructions on how to do a test
2. Bright or pastel colours won't work unless your hair is very light to begin with
3. I don't recommend lightening your own hair unless you know what you're doing. I get my hairdresser to do mine, and you should too if you're unsure of the process, or how your hair will react.
4. Be creative! Mix your own colours, try different combinations and be yourself.
5. Remember, it washes out! But sometimes it can take months, depending on the colour and how 'grabby' your hair is. If you're looking for something less permanent try hair chalk as it washes out on the first wash.
I hope that answers some questions you've had about bright and pastel colours hair dye. You can let me know in the comments below if you have any more questions, or if anything is unclear. Right now, I'm on a mountain in southern Japan, staying with some monks, so I may be slow in responding to your comments, but I promise I will as soon as I come down from the mountain ;)
Kitty
xo