

After awhile, it becomes second nature and you don't even need to think about these settings :)

Common ISO speeds are 100, 200, 400, 800, 1600, 3200 (they do go lower and higher)
Low ISO (100 or 200) PROS:
Your images will be clean and sharp
Low ISO CONS:
You need a lot of light, or a slow shutter speed (long exposure that lets more light in over a period of time) as these settings are less sensitive to light.
High ISO (400 - 3200) PROS:
You can shoot in a lot more conditions, low light, indoors and in the shade.
High ISO CONS:
The higher your ISO, the more noisy (grainy) your images become. They will lose some detail and sharpness.
You should aim to use the lowest ISO possible in your lighting conditions


1. The amount of light entering your camera. When you depress the button to take a shot, the aperture opens and closes for a brief moment. The amount it opens determines how much light is let in. So if you need more light to get in (if you are shooting in low light, indoors etc) you can open your aperture to the largest aperture, which is usually f2.8 If you are shooting, say, a landscape outdoors on a sunny day, you might want to use f22 so your image is not overexposed, it only opens to a small hole and lets less light into your sensor/film.
2. Every f-stop change halves or doubles your required exposure time. For example, if you are shooting on f8 at 1/250 second, when you change to f11 (one aperture size smaller) you need to double the exposure time to 1/125 second. (we will cover this more in the shutter speed section)
3. Depth of Field (also referred to as DOF) I LOVE playing with depth of field, you can get some great results and when you know how to use it, you have such great control over your subject matter. Depth of field refers to the 'field' of your image that is in focus. A shallow depth of field, or narrow depth of field gives a small slice around the point you focus on as a focal point, and everything closer to you is out of focus, as is everything behind your focal point. It's a really great way to make your subject stand out from it's surroundings.
The larger your aperture (hole/opening), the smaller your f-stop - f2.8 // f4, the shallower your depth of field, the more isolated your subject.
This photo uses shallow depth of field, you see the model's face is in focus and the further away from the 'depth' of her face (the distance between her face and the lens) the more out of focus the image becomes.

Image via: Sylwia Bajera
Smaller apertures allow you to get more of your image in focus, so things close to your focal point as well as things far away will be in focus to a much greater depth (thinking in 3d space!) than the lower f-stop numbers.The smaller your aperture (hole/opening), the higher your f-stop - f16 // f22, the wider your depth of field, the more even focus across your entire image.
This image is an example of a small aperture shot, with a wider depth of field. You can see that the foreground is in focus, as is the background. Pretty much everything from the foreground to background is in focus.

via: d o l f i

Shutter speed is important when it comes to movement, if you want to capture something moving fast, like a person running across your frame, a bicycle (moving!) or an animal, you need a fast shutter speed in order to freeze that moment. If the shutter is open too long, and the movement is fast, the subject will be blurred.
This photo shows an example of a fast shutter speed, you know that the skateboarder is going pretty quick, but they've been frozen in time. You can think of it as a quick blink, you have to blink so fast that you DON'T miss it!
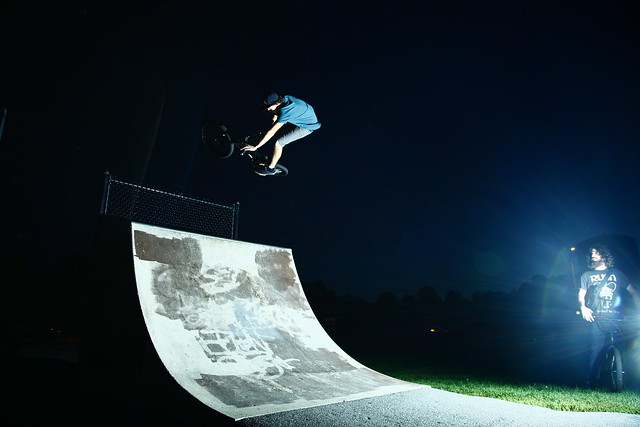
via: RV Henretty-Jornales
If you use a slow shutter speed, with a tripod, you can capture movement over a long period of time. This method is popular for capturing flowing movement like this nighttime street-scape, or those postcard pictures you see of running water.
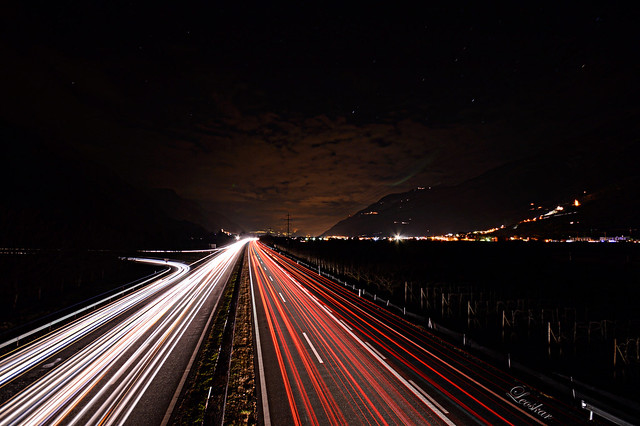
via: leoskar
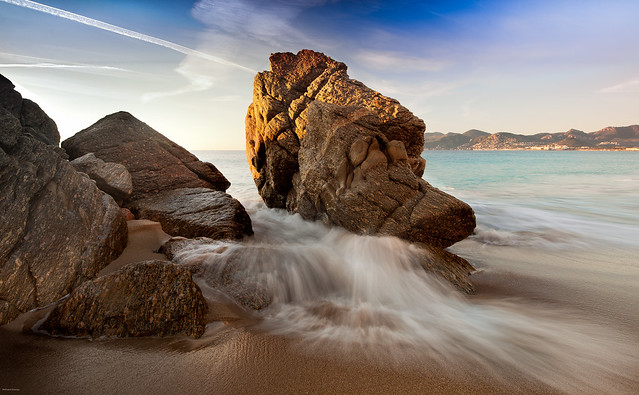
via: 1D110
I hope that you've found this introduction helpful. I'll cover some more basics in my next tutorial, including how to mix these settings together to get the results you're after. I'll also take into account point and shoot cameras and tell you how you can use the basic settings to get some basic control. Please let me know in the comments if anything is unclear or if you have specific requests for future Photo101 topics.
Thanks for reading :)
Kitty
xo


No comments:
Post a Comment